
---feature:roselia-dom---
ANSI Escape Sequence
在使用非Windows平台上的terminal的时候,我们有时会惊叹于其丰富的文本内容,其文本可以改变颜色, 增加下划线,加粗等等效果,宛如在写一个web page。
又例如,在2.7版本的Lisa以后,控制台的字符也支持着色了,如图:
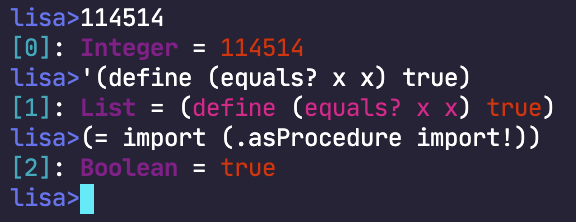
控制台的显示设置由选择图形再现(Select Graphic Rendition, SGR)参数决定1。
SGR参数属于ANSI转义序列的一种,以"\u001b["开头,即Esc+[,
具体是Esc [ 参数 m,其中参数是若干个数字,以分号;分割。[,m分别代表相应字符,大小写敏感。
例如,我要传入两个SGR参数,分别是103和31,查表,分别代表亮黄色背景和红色前景,则其相应的转义序列为:\u001b[103;31m,即如果stdout在输出相应的字符之后,接下来的字符都按照亮黄色背景,红色的方式输出。
计算机对参数的读取可以理解为状态机,在某些参数之后可以接着更多的参数,即,terminal在进入某种状态之后可以接受更多的参数,转移到新的状态。
目前,terminal接受一些预定义的颜色,例如红色,品红之类的,这些颜色在不同平台上具有不同的颜色,取决于具体的实现。但是,在2020年下半年的现在,大家都习惯于24bit的「绚丽色彩」了,自然现在许多非Windows平台上的终端模拟器都支持TrueColor了。
想要设置自定义颜色,其参数应当是这样的:
-
设置前景色,即文字颜色,参数为:38,2,R,G,B。38和2都为固定的数字,后面的RGB为颜色的RGB值。
-
设置背景色,第一个参数改为48,其余不变。
r{{ def('window', useMemo(''.constructor.constructor('return window'), [])) }} r{{ defState('hexColor', currentTheme().primary) }} r{{ def('decos', useReactiveState({ reset: false, underline: false, bold: false })) }} r{{ def('rgb', useMemo(() => { if (hexColor.length !== 4 && hexColor.length !== 7) { toast(hexColor + ' may not a valid hex color', 'warning') return [] } return hexColor.substring(1).replace(/(..)(?=.)/g, "$1-").split('-').map(s => window.parseInt(s, 16)) }, [hexColor])) }} r{{ def('isBright', useMemo(() => { const [r, g, b] = rgb; const brightnesss = 0.2126 * r + 0.7152 * g + 0.0722 * b; return brightnesss > 128; }, [hexColor])) }}
请在下方输入你的颜色,我们以你输入的颜色为例,你输入的颜色为r{{ hexColor }},这个是16进制颜色,需要先转换为RGB颜色。 其值为:R = r{{ rgb[0] }}, G = r{{ rgb[1] }}, B = r{{ rgb[2] }}。
所以,如果你想要打印r{{ hyperScript.span({ style: {color: hexColor} }, '这个颜色') }}的文字,就要传入这些SGR参数:r{{ [38, 2].concat(rgb).join(', ') }}, 相应的转义序列为: \u001b[ r{{ [38, 2].concat(rgb).join(';') }}m
同理,如果你要打印r{{ hyperScript.span({ style: {background: hexColor, color: isBright ? '#000' : '#fff' } }, '这个背景') }}的文字,就要传入这些SGR参数:r{{ [48, 2].concat(rgb).join(', ') }}, 相应的转义序列为: \u001b[ r{{ [48, 2].concat(rgb).join(';') }}m
如果我们想要清空当前SGR参数,只需要传一个0即可,我们通常会在改变完文字的格式以后,立即传入以防止污染接下来的格式。
下面是Playground,以供更加真切地体会ANSI 转义序列。
r{{ def('argument', useMemo(() => { if (decos.reset) return [0] const args = [] if (rgb.length) { args.push(38) args.push(2) rgb.forEach(e => args.push(e)) } if (decos.bold) args.push(1) if (decos.underline) args.push(4) return args }, [...rgb, decos.bold, decos.reset, decos.underline])) }} r{{ createElement('div', null, window.Object.keys(decos).map((key) => { return hyperScript.div( hyperScript.span(key), hyperScript.input({ type: 'checkbox', checked: decos[key], oninput() { decos[key] = this.checked } }) ) })) }} 你输入的颜色: r{{ hyperScript.input({ type: "color", value: hexColor, oninput() { hexColor = this.value } }) }} r{{ hyperScript.input({ value: hexColor, oninput() { hexColor = this.value }, style: { background: hexColor, color: isBright ? '#000' : '#fff' } }) }}
r{{ defState('text', 'Hello, World!') }} 输入的文字: r{{ hyperScript.input({ value: text, oninput() { text = this.value }, style: { border: '1px solid' } }) }}
其整体的序列为:\u001br{{ def('argString', useMemo(() => { return "[" + argument.join(';') + 'm' }, [argument])) }}r{{text}}\u001b[0m
你可以这么在命令行中测试:
echo "\u001br{{ argString }}r{{ text }}\u001b[0m"
在命令行中的效果: r{{ useMemo(() => { let el = text if (decos.reset) return el if (decos.bold) el = hyperScript.b(el) if (decos.underline) el = hyperScript.u(el) return hyperScript.span({ style: { color: hexColor } }, el ) }, [text, argString]) }}